White Ink File Setup
First, you'll need to create a Spot Color swatch in your palette called
White. Select the Color Type as Spot while leaving the Color Mode as CMYK.
You should give it a bit of color (say, 15% Cyan) so you can see it in your design.

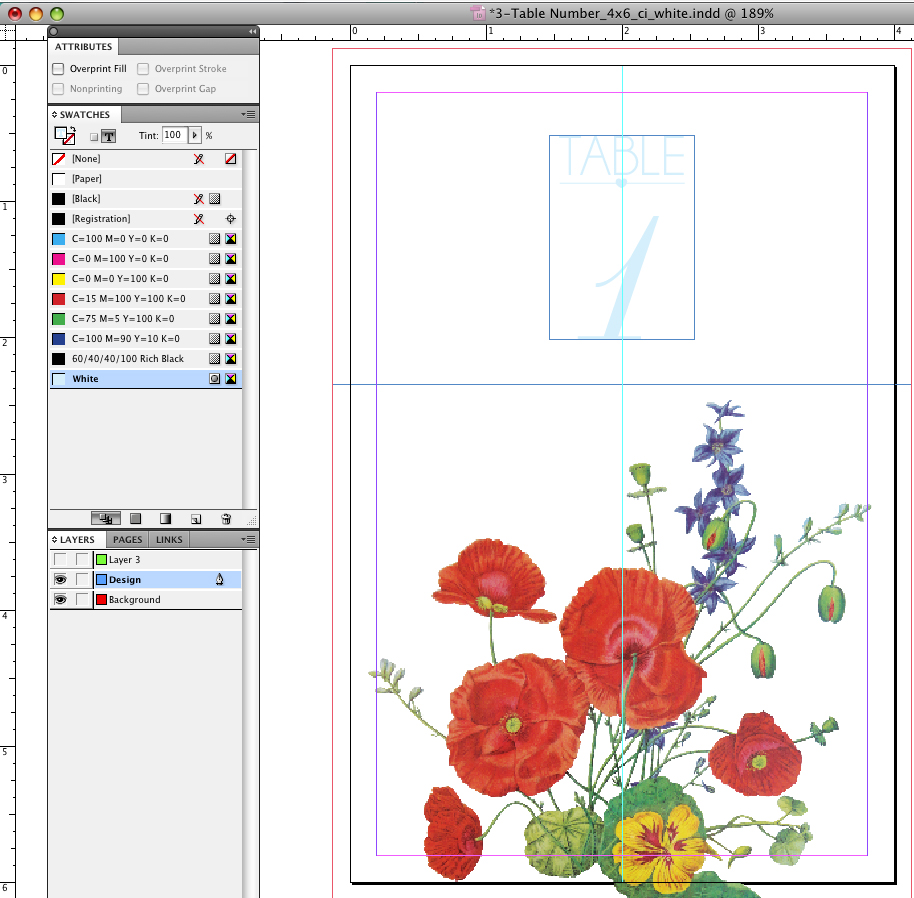
Assign the color White to all parts of your art that you wish to print in white
ink. In this picture, you see that the text and images at top have been set to print white.
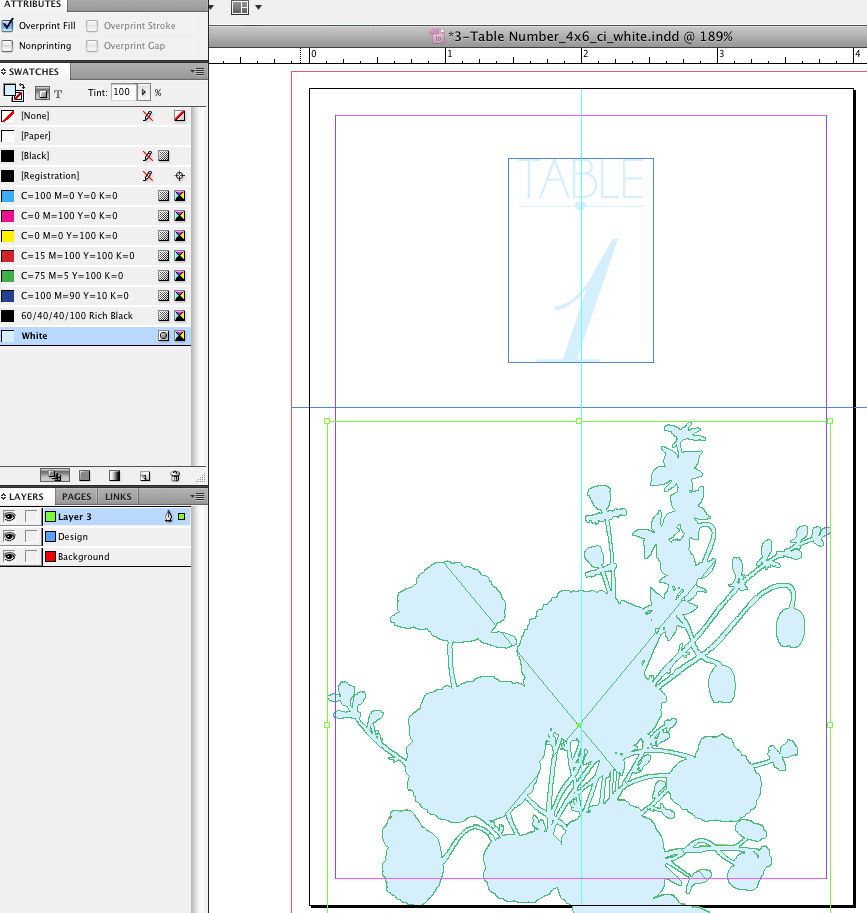
If you wish to have white ink print under the CMYK, your White areas need to be
placed on top of the CMYK areas and be set to overprint. In the picture below,
you can see that we have a White area for the flowers overlaid on the image
and in the upper left corner, it shows we have set the Attributes to Overprint Fill.
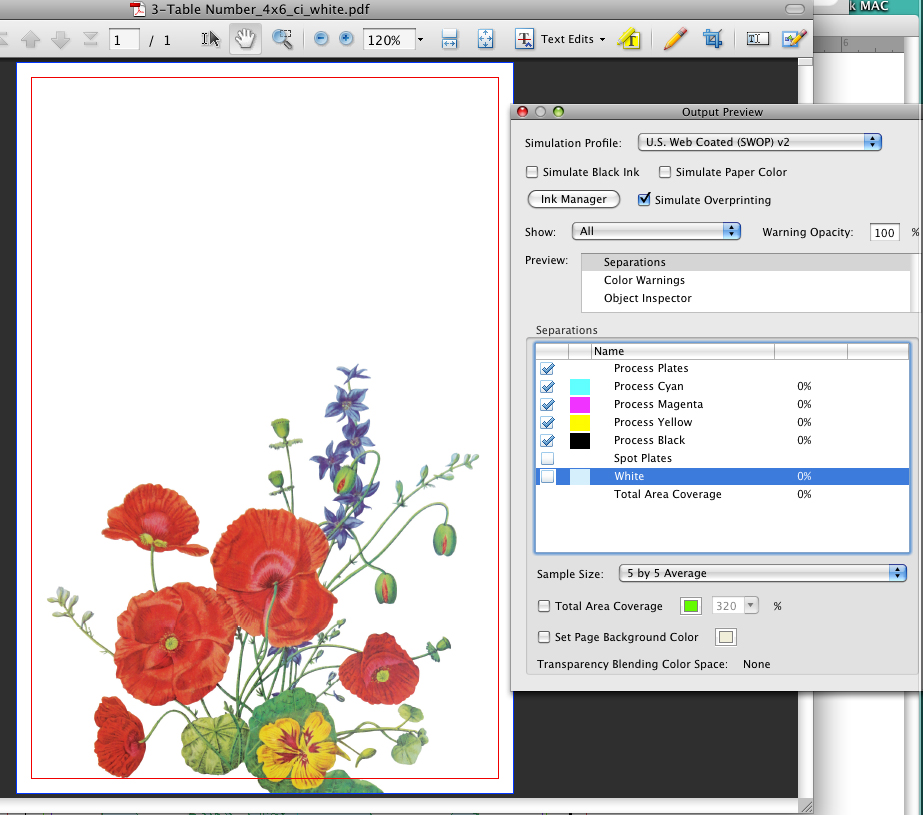
When you generate your PDF/X-1a:2001 and view using the Output Preview feature,
you should have an additional Spot Color separation called White. The top picture
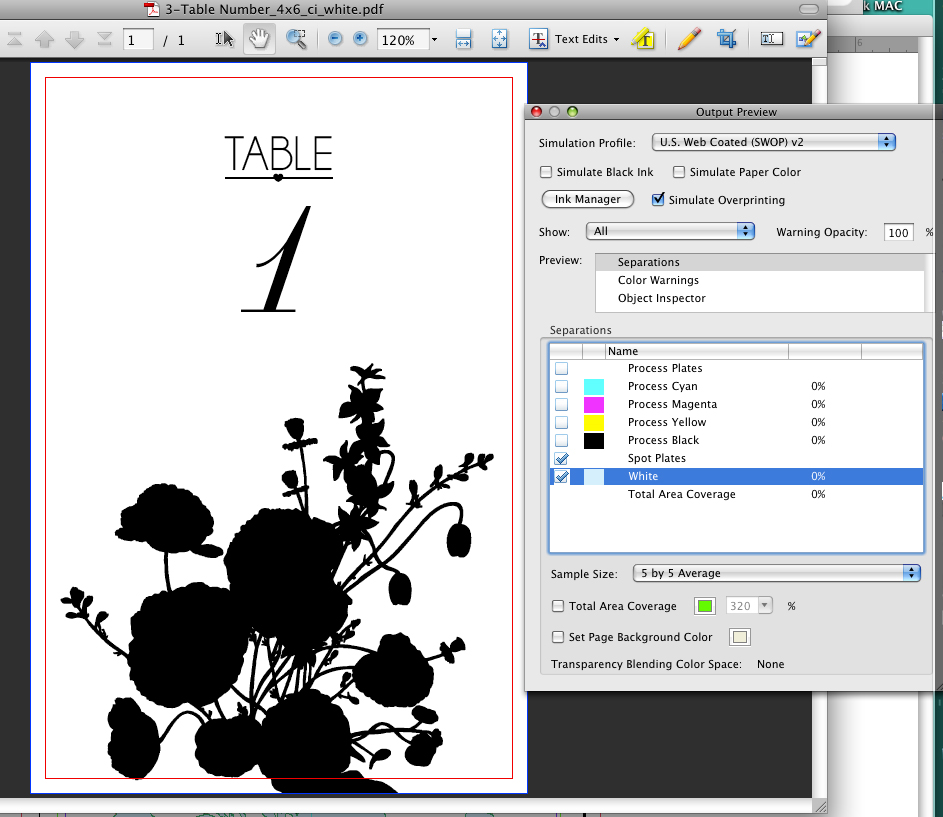
shows the CMYK portion of your image. In the bottom picture, by shutting off the CMYK
separations, you can verify that the white has been properly set up for your project.
 Shop with Confidence